| A
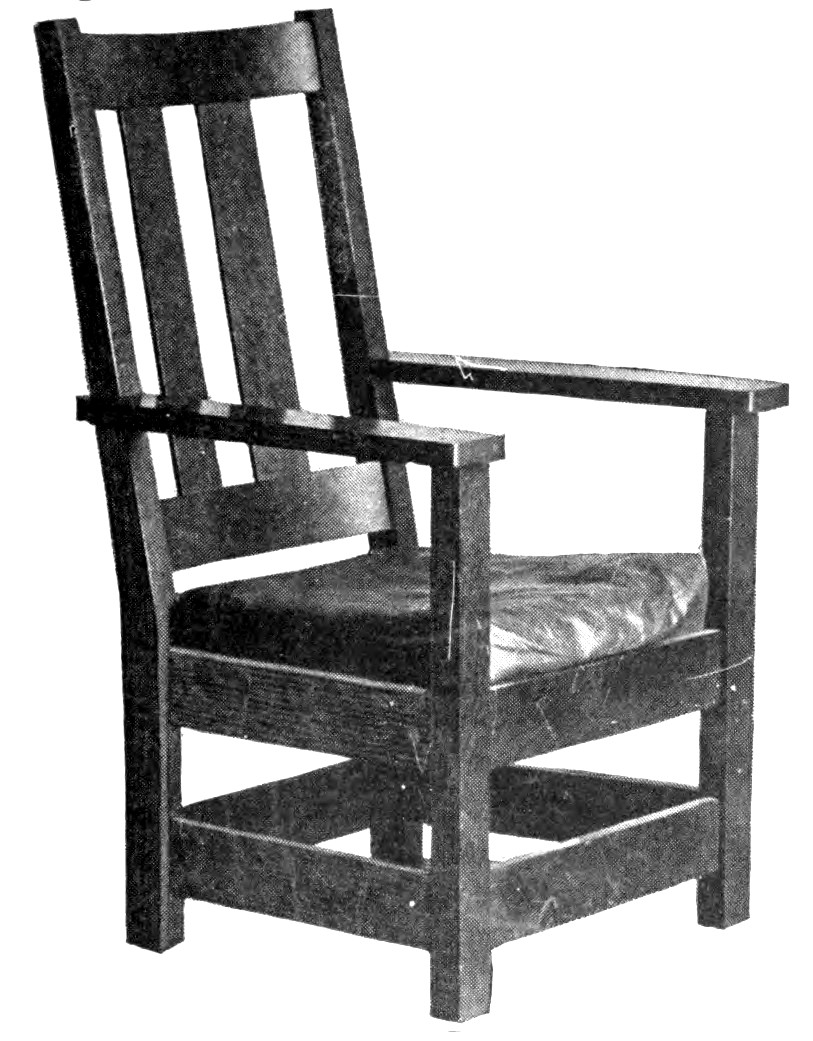
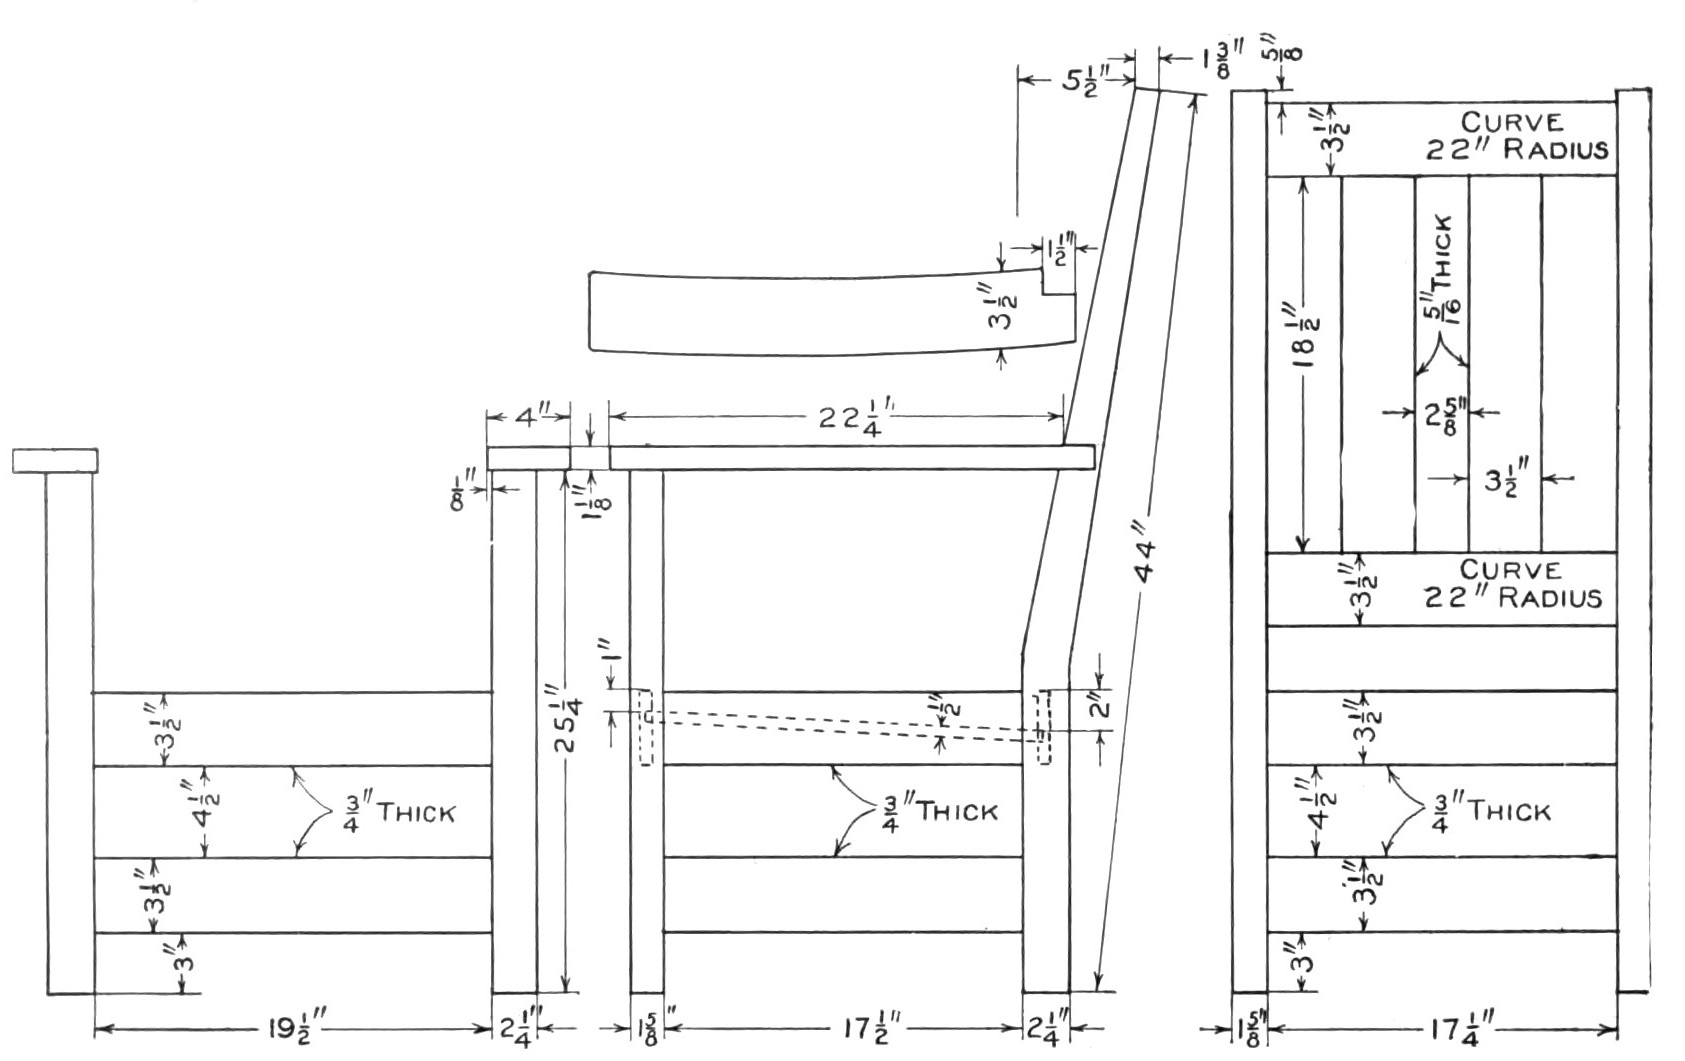
CURVED BACK ARM CHAIR
The arm chair, the
picture and drawing of which is given herewith is a companion piece
to the rocker described on another page.
With the
exception of the
back legs the stock bill which follows gives the thicknesses and
widths exact. To the length, however, enough has been added to allow
squaring up the ends.
Plain sawed
white or red
oak will be suitable for a design such as this.
Front posts,
2 pieces, 1 5/8
by 2 1/4 by 26 in., S-4-S.
Back posts,
1 piece, 1 5/8
by 8 by 45 in., S-2-S.
Front
horizontals,
2 pieces, 3/4
by 3 1/2 by 21 1/2 in. S-4-S.
Rear
horizontals,
4 pieces, 3/4
by 3 1/2 by 19 1/4 in., S-4-S.
Side
horizontals,
4 pieces, 3/4
by 3 1/2 by 19 1/4 in., S4-S.
Back slats,
2 pieces, 5/16
by 3 1/2 by 19 1/4 in., S-4-S.
Arms,
2 pieces, 1 1/8
by 4 by 24 in., S-4-S.
Seat slats,
5 pieces, 1/2
by 2 1/4 by 20 in., S-4-S.
Begin work by
squaring up
the ends of the front posts and shaping the rear ones Chamfer the
ends of the tops and bottoms slightly so that they shall not splinter
through usage. Next lay out the mortises and tenons.
The curved
horizontals
for the back should now be prepared and steamed as described on
another page. The curved form to which the steamed piece is to be
clamped to give shape to it should be curved slightly more than is
wanted in the piece, as the piece when released will tend to
straighten a little.
The arms of the
chair may
be shaped while these pieces are drying on the forms. The rails of
the front and back may be tenoned, too. It should be noted that the
front of the chair is wider than the back. This will necessitate care
in mortising and tenoning the side rails so as to get good fits for
the shoulders The bevel square will be needed in laying out the
shoulders of the tenons.

Arm
Chair Having Bent-Wood Back
Assemble the back,
then
the front. When the glue has hardened on these parts so that the
clamps may be removed, put in the side rails or horizontals and again
adjust the clamps. The arms are to be fastened to the posts with
dowels and glue.
The seat, it
will be seen
from the drawing, is to be a loose leather cushion to rest upon
slats. These seat slats may be fastened to cleats which have been
previously fastened to the inside of the front and back seat rails or
they may be "let in" to these rails by grooving their inner
surfaces before the rails have been put in place. The latter method
is more workmanlike, but more difficult.
A cushion such
as is
shown can be purchased ready made up, or it may be made by the
amateur by lacing together two pieces of Spanish leather cut to size
and punched along the edges so as to allow a lacing of leather thong.
It may be filled with hair or elastic felt such as upholsterers use.
Probably the
simplest
finish that can be used is weathered oak. Put on a coat of weather
oak oil stain, sandpaper lightly when dry and then put on a very thin
coat of shellac. Sand this lightly and follow with two or more coats
of floor wax put on in very thin coatings and polished well.

(click for larger image) |

